

How To Create Raid 5 In Ibm Server
RAID configuration on the IBM Power platform
RAID stands for Redundant Array of Independent Disks and it involves two key design goals: Increased data reliability and increased input/output (I/O) performance. When multiple physical disks are set up to use the RAID technology, they are said to be in a RAID array. This array distributes data across multiple disks, but the array is seen by the computer user and operating system as one single disk. RAID can be set up to serve several different purposes.
Different types of RAID levels
Different types of RAID levels are available. Some are basic RAID levels and some are a combination of basic levels.
- RAID 0
- RAID 1
- RAID 5
- RAID 6
- RAID 10
- RAID 50
- RAID 60
Here, RAID 0, RAID 1, and RAID 5 are the basic RAID levels and the remaining RAID 6, RAID 10, RAID 50, and RAID 60 are the combination of the basic RAID levels.
Each RAID level is defined for a specific purpose. Read through the following table to get a better understanding about the various RAID levels.
| RAID level | Minimum drives | Protection | Description | Strengths | Weakness |
|---|---|---|---|---|---|
| RAID 0 | 2 | None | Data striping without redundancy | Highest performance | No data protection; If one drive fails, all data is lost |
| RAID 1 | 2 | Single drive failure | Disk mirroring | Very high performance; Very high data protection; Very good on write performance | High redundancy cost overhead; Because all data is duplicated, twice the storage capacity is required |
| RAID 5 | 3 | Single drive Failure | Block-level data striping with distributed parity | Best cost/performance for transaction-oriented networks; Very high performance, very high data protection; Supports multiple simultaneous reads and writes; Can also be optimized for large, sequential requests | Write performance is slower than RAID 0 or RAID 1 |
| RAID 6 | 4 | Two-drive failure | Same as RAID 5 with double distributed parity across an extra drive | Offers solid performance with the additional fault tolerance of allowing availability to data if two disks in a RAID group is to fail;Is recommended to use more drives in RAID group to make up for performance and disk utilization hits compared to RAID 5 | Must use a minimum of five drives with two of them used for parity, so disk utilization is not as high as RAID 3 or RAID 5. Performance is slightly lower than RAID 5 |
| RAID 10 | 4 | One disk per mirrored stripe (not same mirror) | Combination of RAID 0 (data striping) and RAID 1 (mirroring) | Highest performance, highest data protection (can tolerate multiple drive failures) | High redundancy cost overhead; Because all data is duplicated, twice the storage capacity is required; Requires minimum of four drives |
| RAID 50 | 6 | One disk per mirrored stripe | Combination of RAID 0 (data striping) and RAID 5 (single parity drive) | Highest performance, highest data protection (can tolerate multiple drive failures) | High redundancy cost overhead; Because all data is duplicated, twice the storage capacity is required; Requires minimum of four drives |
| RAID 60 | 8 | Two disks per mirrored stripe | Combination of RAID 0 (data striping) and RAID 6 (dual-parity drives) | Highest performance, highest data protection (can tolerate multiple drive failures) | High redundancy cost overhead; Because all data is duplicated, twice the storage capacity is required; Requires minimum of four drives |
Supported RAID levels in IBM Power platforms
The following RAID levels are supported by IBM Power hardware.
- RAID 0
- RAID 5
- RAID 6
- RAID 10
Configuring RAID on the Power platform
Perform the following steps to configure RAID 5 on the Power platform.
- Get the supported diagnostics CD for the specific hardware. Here I'm going to configure RAID on the Power platform; hence I have used the following media. Standalone diagnostics Version 7.1.2.15 (For selected Power/PowerPC based systems)
- Create the logical partition (LPAR) by assigning the RAID controller to it. Note that we can not merge two or more disk controllers for a single RAID array configuration.
- Start the LPAR with the diagnostics CD.
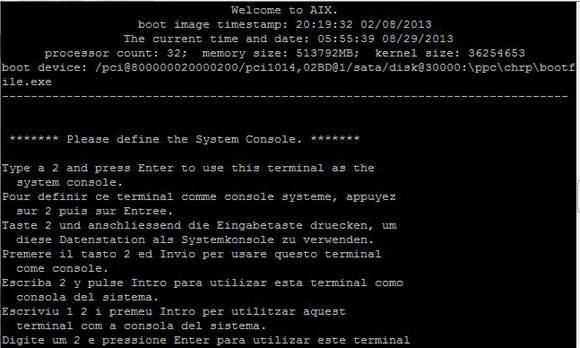
- Type 2 and then press Enter, as mentioned in the console screen.
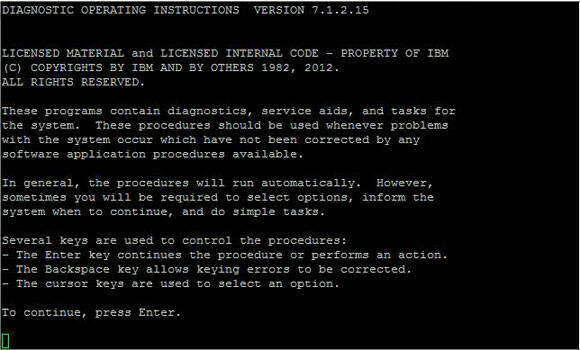
- Press Enter to continue.
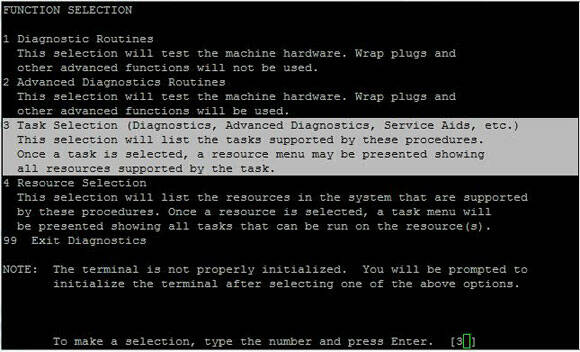
- On the FUNCTION SELECTION page, select the third option.
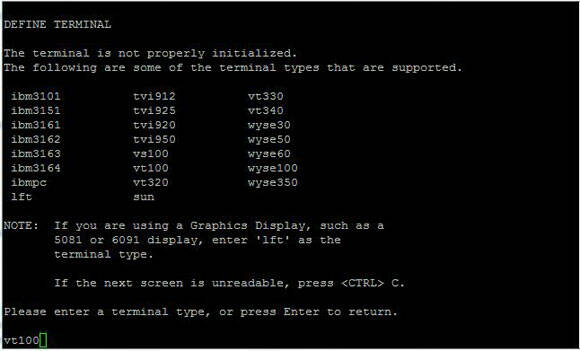
- Enter the terminal type, preferably vt100 and press Enter.
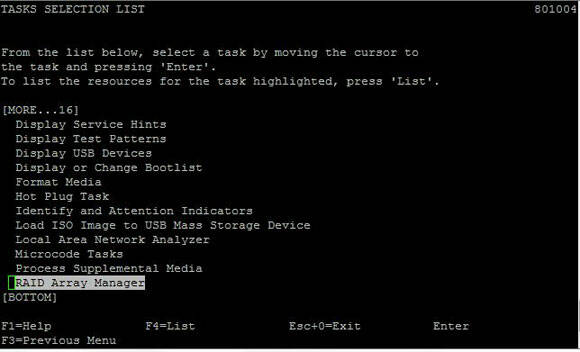
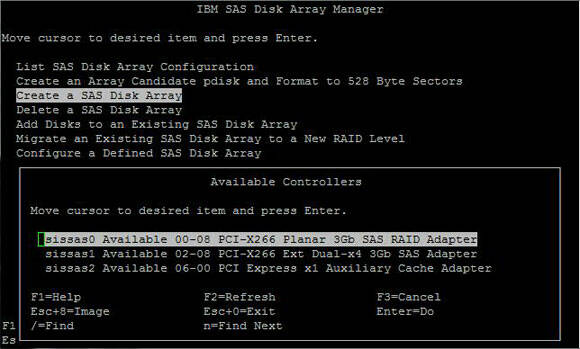
- From the tasks selection list, select RAID Array Manager and press Enter.
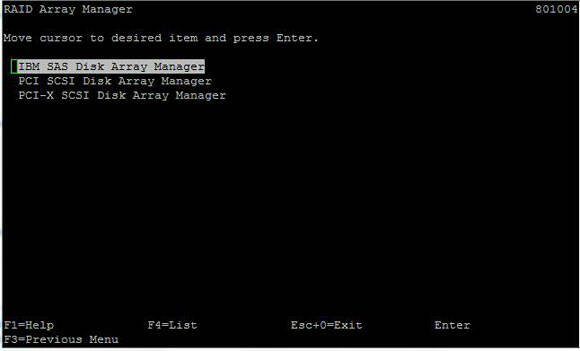
- From the list of available disk controllers, select an appropriate disk array manager and press Enter.
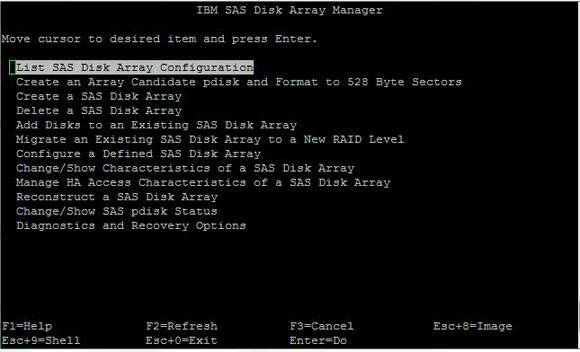
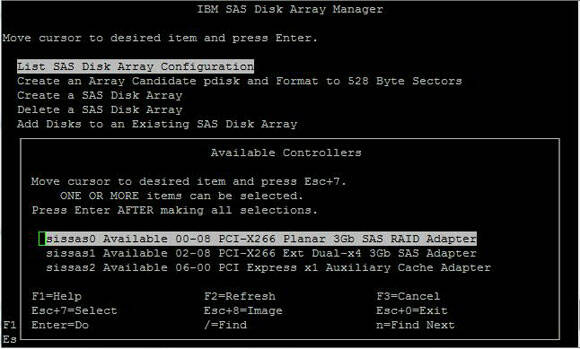
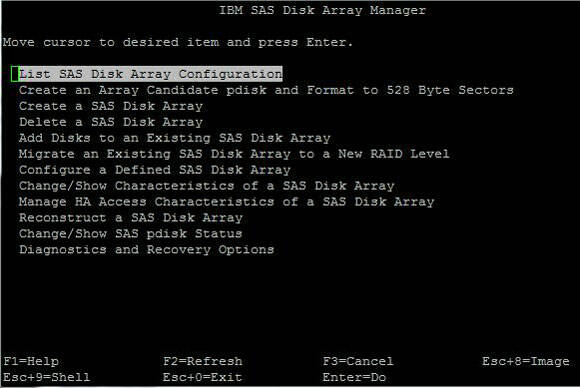
- In the disk array manager, we can get different options for different operations, such as listing, creating, deleting and so on. Select List SAS Disk Array Configuration.
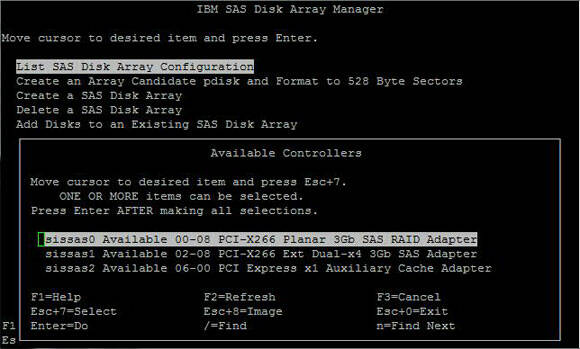
- Then, select the appropriate RAID adapter. To do so, move the cursor to the required option and press Esc+7.
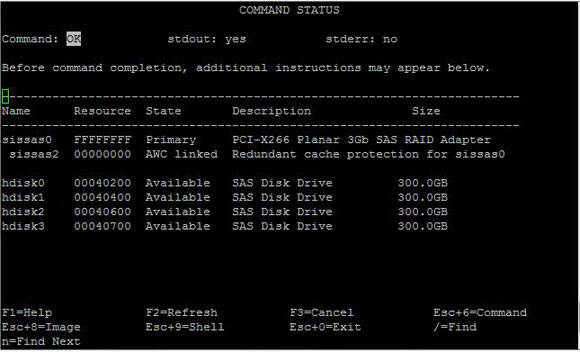
A list of disks that is available in the selected controller is displayed.
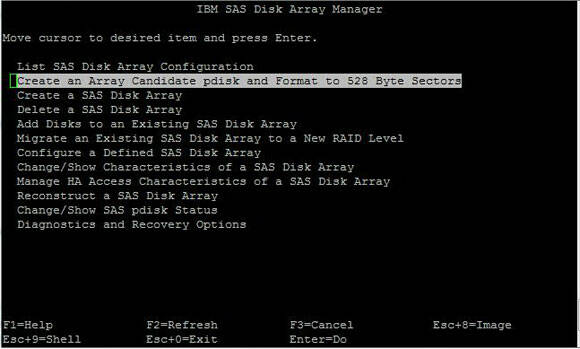
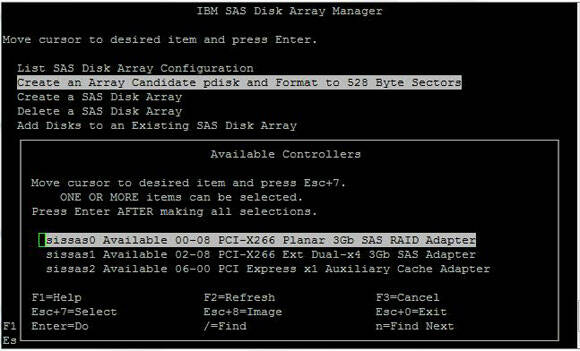
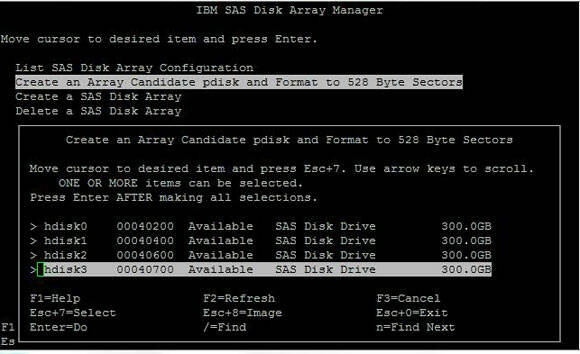
- Now, press F3 to move back to the main screen. Then, select the Create an Array Candidate pdisk and Format to 528 Byte Sectors option and press Enter. It is mandatory to create an array candidate.
- Select the Small Computer System Interface (SCSI) controller for selecting disks to create array candidates.
- Press F7 or Esc+7 to mark the disks as an array candidate.
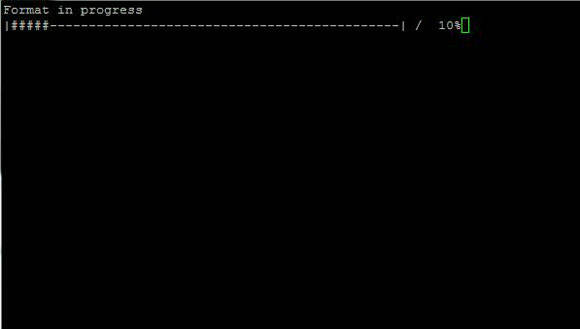
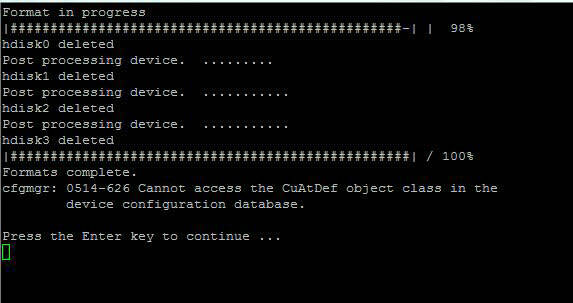
- After selecting the disk, press Enter to begin formatting.
- Press Enter to continue.
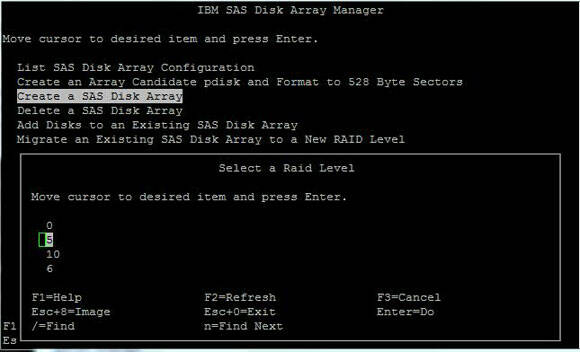
- Now, create the array using the array candidates.
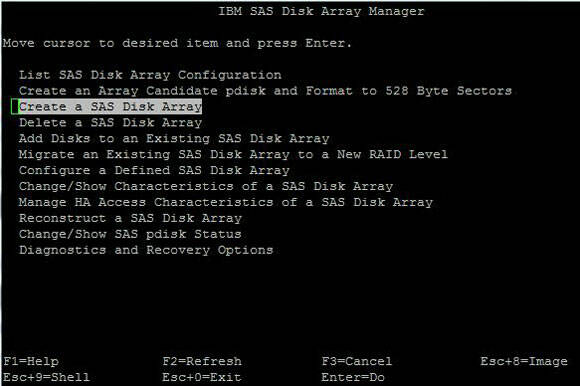
- Select the required RAID level. In this example, I've selected RAID 5.
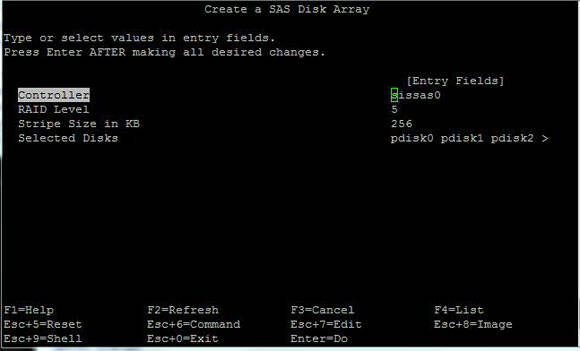
- Select the stripe size (256 Kb is the default and recommended) and press Enter.

- Select the array candidates on which to create RAID and press Enter.

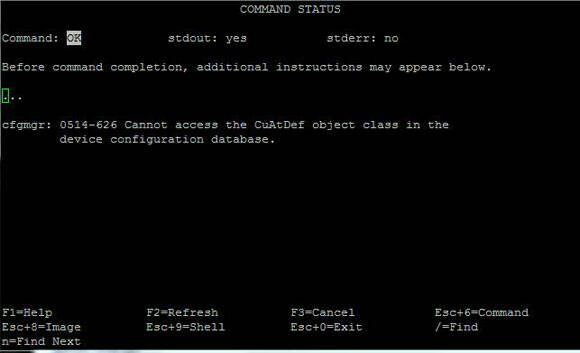
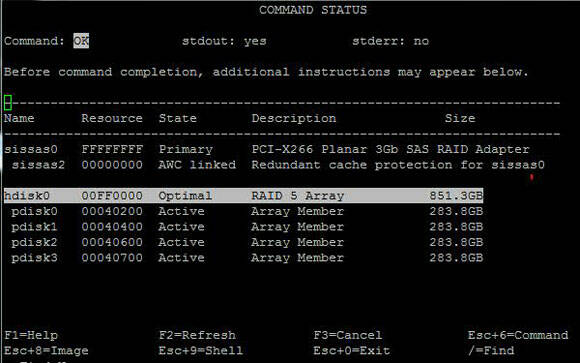
- After your configuration is complete, press Enter. The following screen is displayed.
- Now we are ready with the RAID configuration. Press F3 to go to the main screen.
- For checking the array configuration status, select List SAS Disk Array Configuration.
After the hdisk is available, it is ready for use by assigning it to any LPAR.
General usage of this setup
This kind of setup is mainly for hardware redundancy with respect to disks.
- Hardware data redundancy with RAID 5 is more stable than the OS-level mirroring.
- This setup is best suited when we assign a disk from Virtual I/O Server (VIOS) to many LPARs.
- No need to configure the OS-level mirror in all LPARs.
How To Create Raid 5 In Ibm Server
Source: https://developer.ibm.com/articles/au-aix-raid/
Posted by: henryrocklairling1983.blogspot.com
0 Response to "How To Create Raid 5 In Ibm Server"
Post a Comment